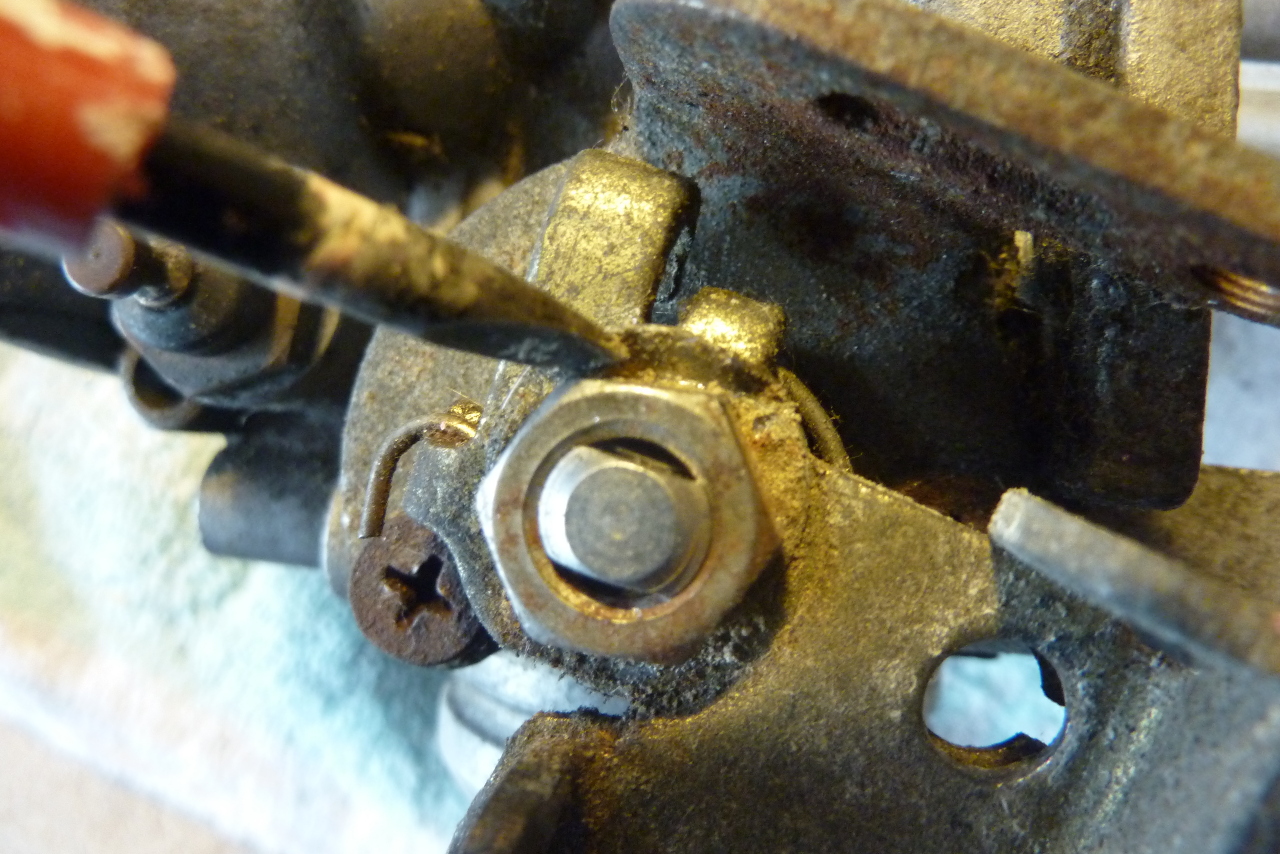
Getting butterfly valves out is somewhat tricky. Do not attempt this unless you are sure about what you are doing (btw I wasn't sure and it didn't stop me - you have been warned) or you have the insurance of a back up set of carbs (which I did).
Firstly, you really need the JIS (Japanese Industrial Standard) crossheaded screwdrivers. If you are to unscrew the screws holding the butterflies in, you want to be sure you are not going to strip them. You cannot get a Dremel, or risk putting a drill, down the throat of one of your carbs.
The screws are burred over on the other side of the butterfly to stop them coming undone. I never found this to be a problem. The problem was getting sufficient grip and pressure on the screw without damaging anything else. Any stiffness in the screw is a result either of them just having been put in very tightly or they may have even used some locking cement during assembly. Burring over just makes them tight as they pull through the threads but it does not hold them tight against the stainless steel throttle rod.
You will need to apply a good deal of pressure on these screws but you do not want to bend the stainless steel throttle valve rod. You won't be able to get the butterflies to seat properly again if that happens.
This is what I did:
First use your concoction to permeate into the screw threads. I can't underestimate how much easier this stuff makes it.

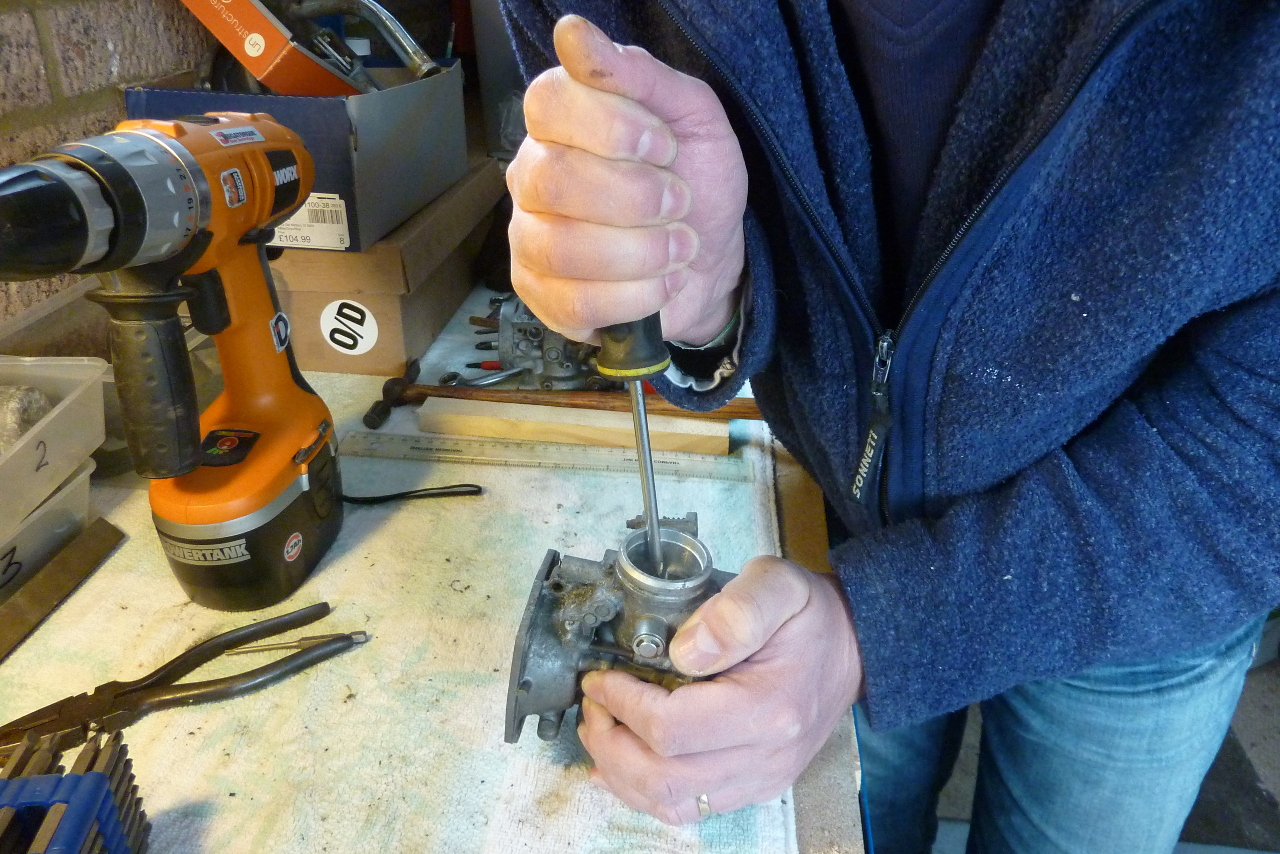
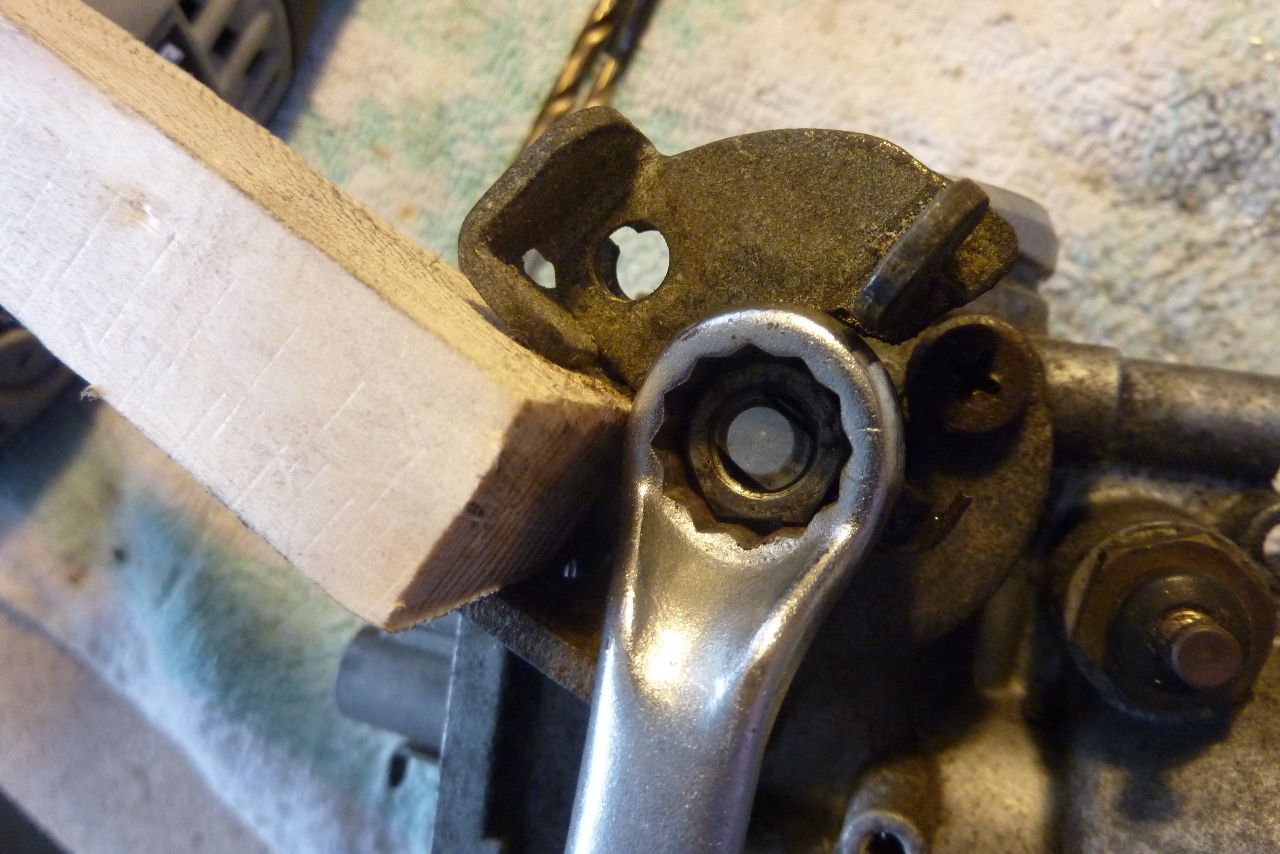
Then we need to construct a throttle rod support.
I got a suitably
sized piece of wood that was about half an inch longer than the
distance from the underside of the butterfly valve to the airbox end of
the carbs.
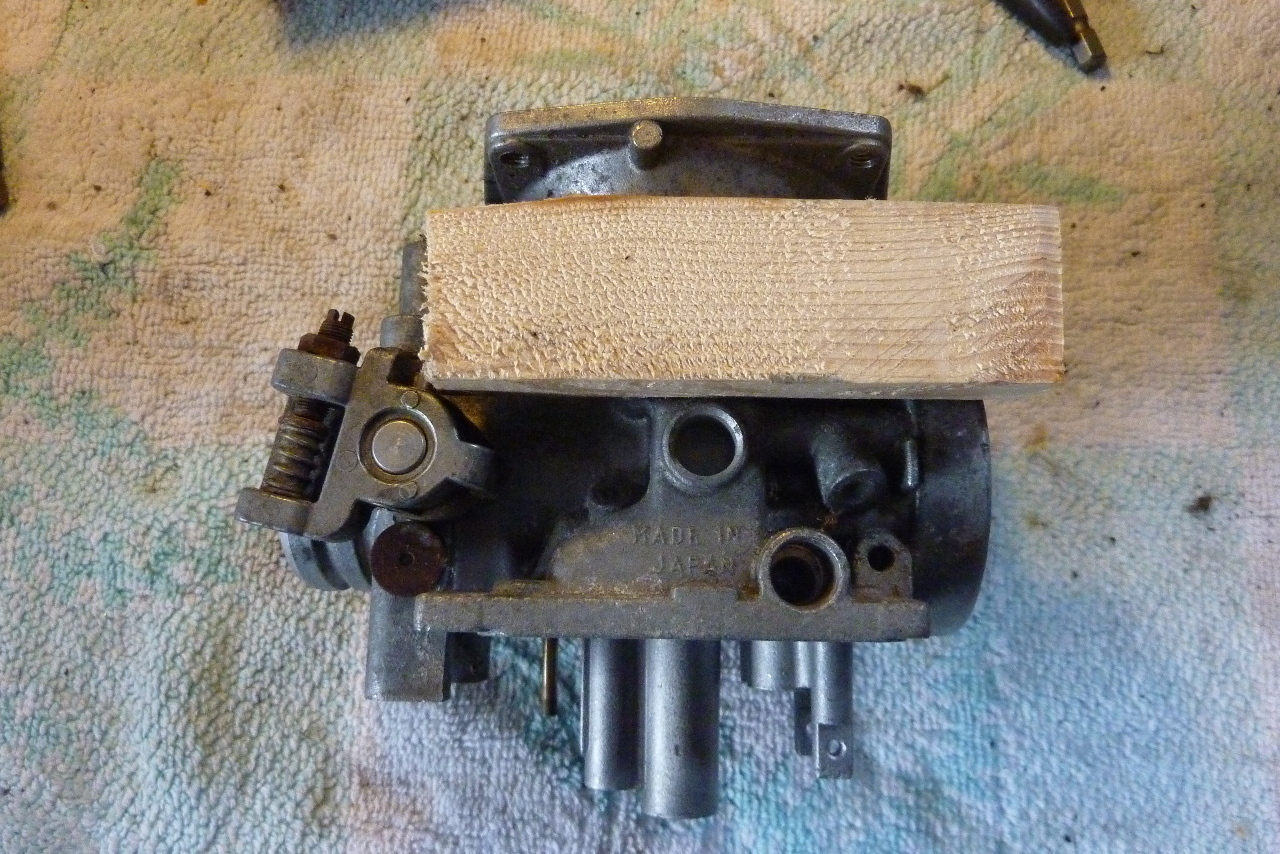

It needs to be able to fit down the throat of the carbs and rest on the throttle valve rod and extend out of it at the airbox end.

This piece of wood will provide the resistance to the force you are going to apply getting the screws out.
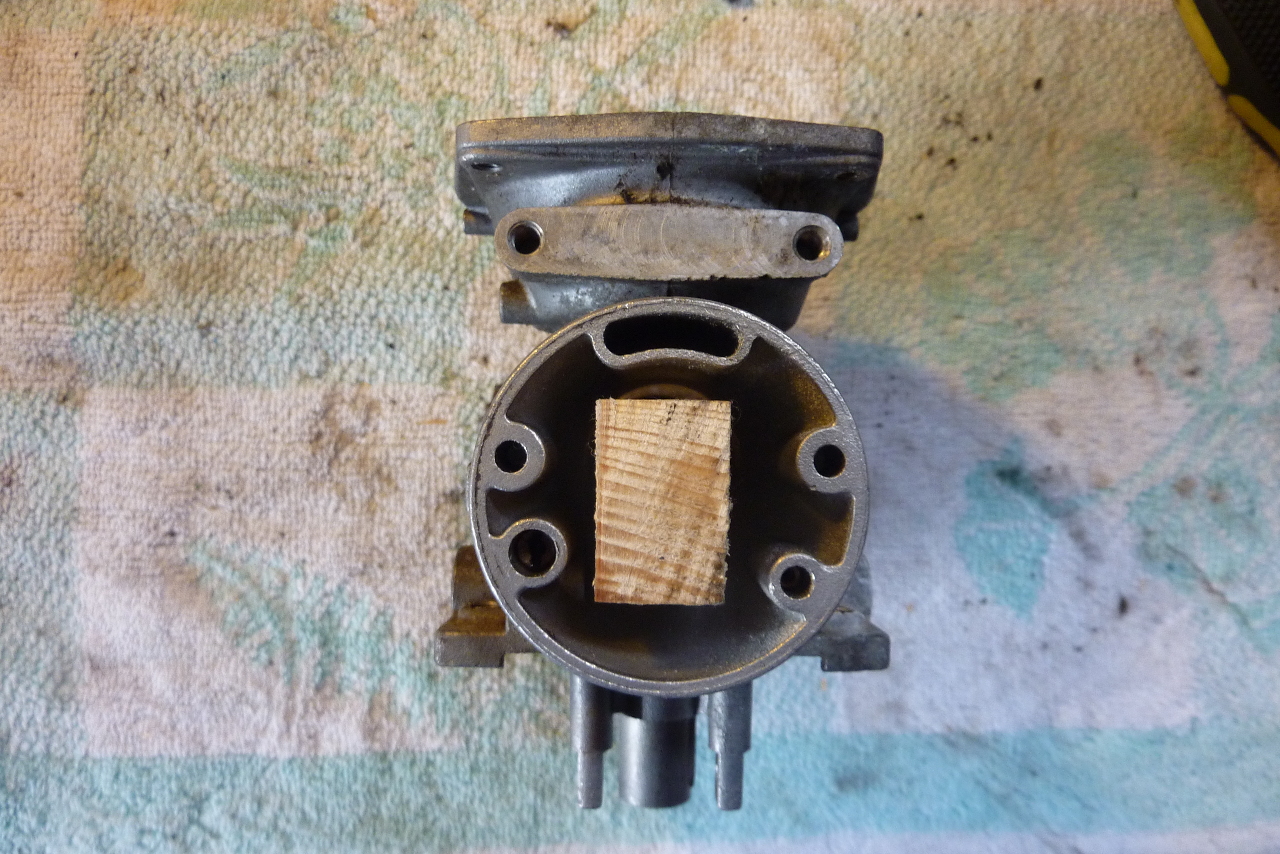
Like this:
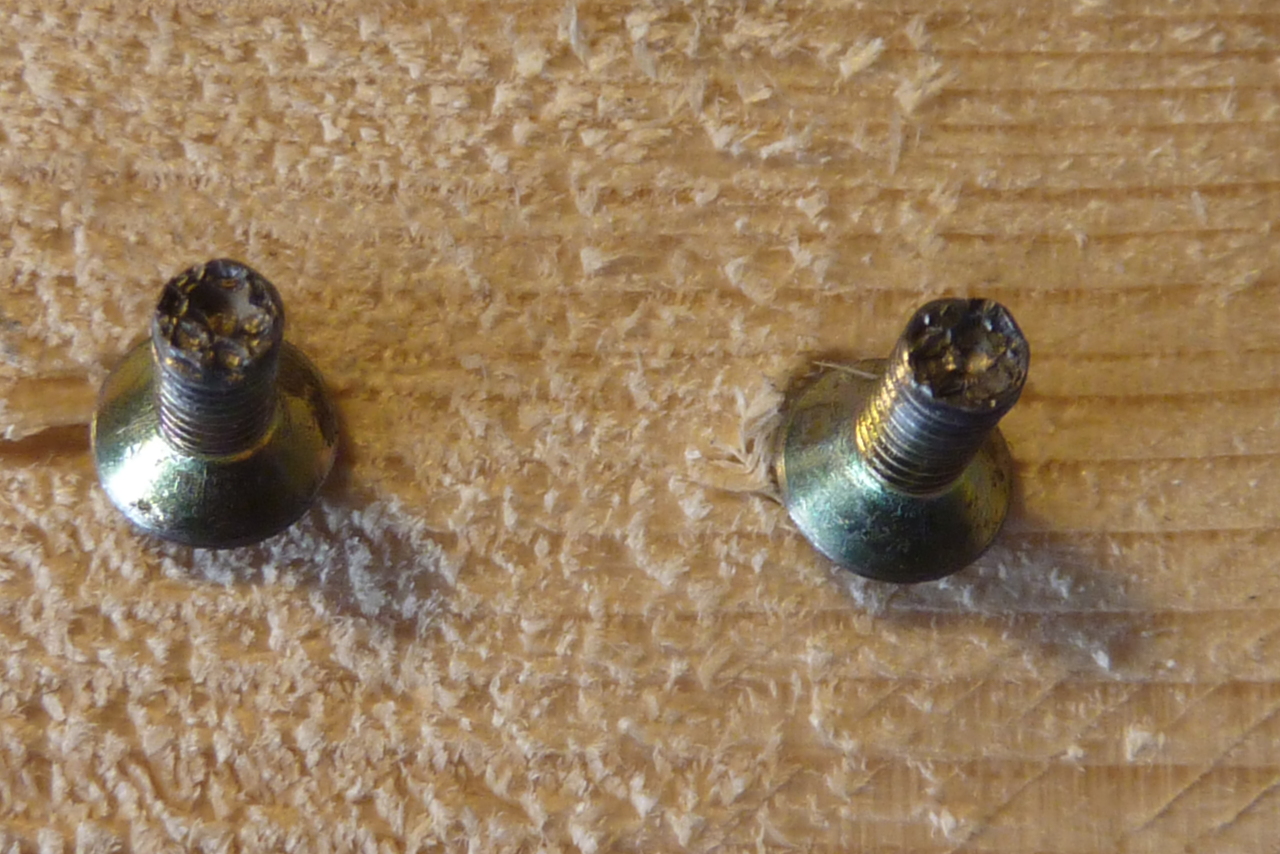
Here
are the screws and you can see the marks on them where they have been
burred over to prevent them coming lose. Haven't got any idea yet how I
am going to be able reassemble this little lot and how I get them burred over again. Oh well. We'll meet that when we get there (click to enlarge images).

Once you have the screws out and you have taken the butterfly out, you will need to release one end of the rod to be able to pull it through. For carbs 1 and 4 you simply remove the cap, undo the circlip and push the rod through.

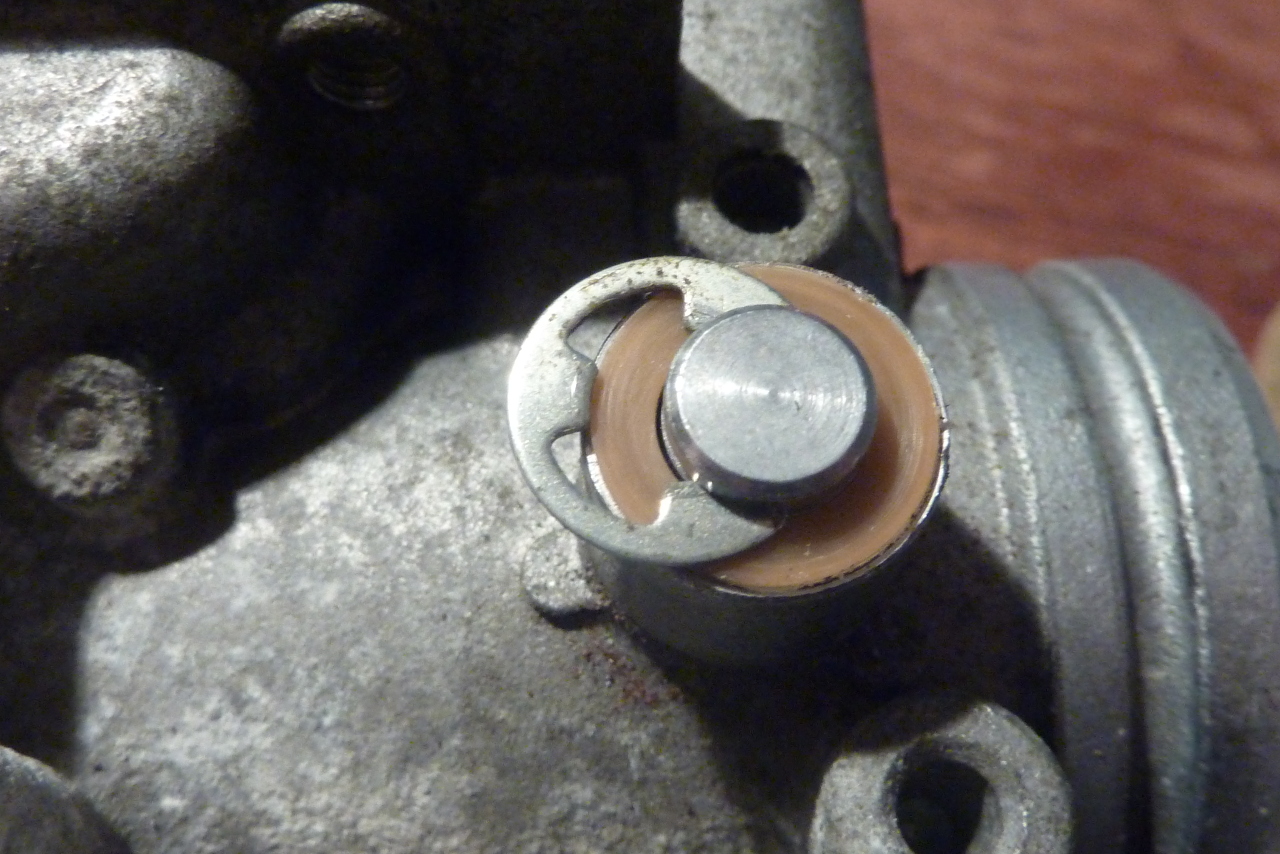

Then take out and replace these seals.

I read somewhere that it is a good idea to count the number of times the springs have been coiled so that you know how much tension to put on them when you get to reassembly. I have my insurance set of carbs at hand so I didn't need to do this.

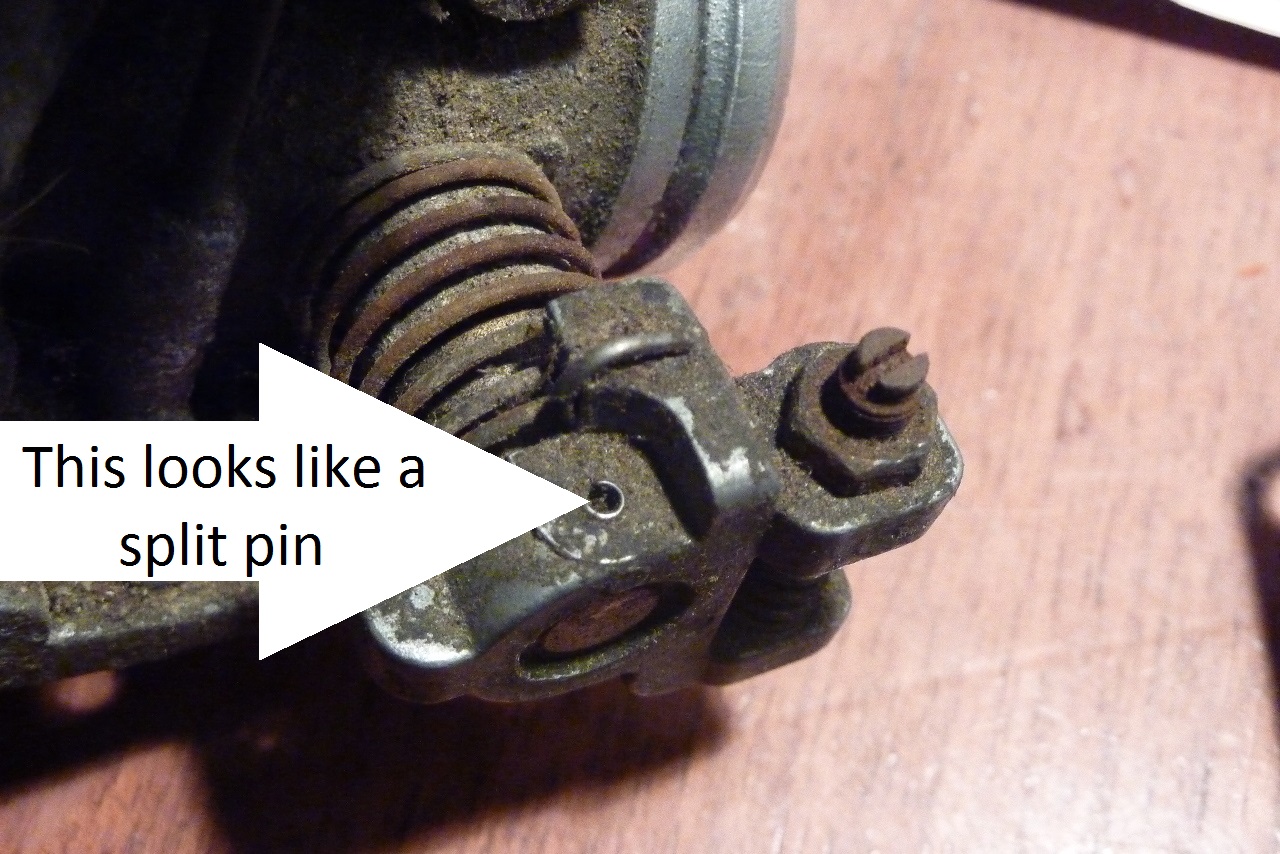
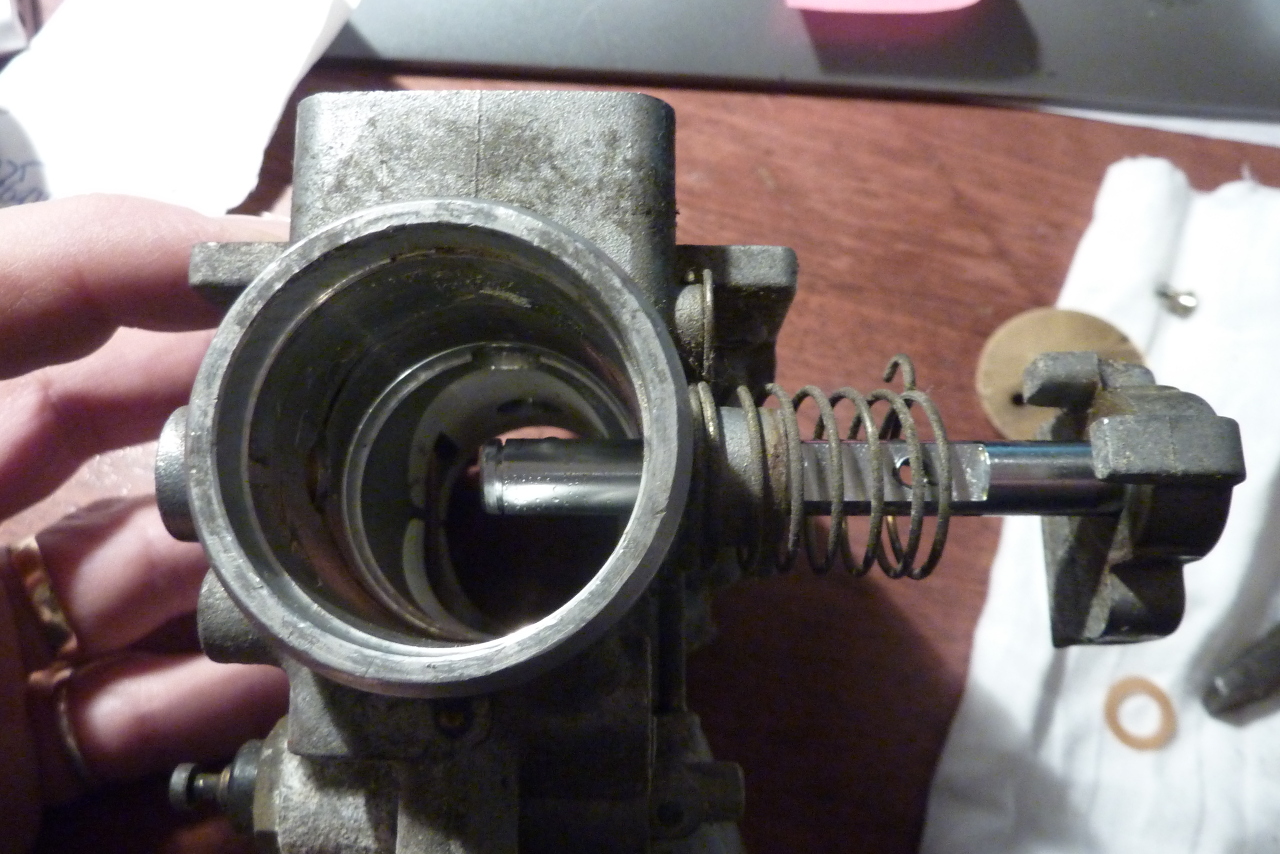
On carb no. 3 you need to flatten the retaining disk and unscrew the nut attached to the throttle rod.
I didn't want the force of unscrewing the nut to put pressure on the butterfly which in turn may damage the surface of the venturi. So I tried several methods of preventing the rod from turning. This method caused the butterflies to start bending and was obviously putting too much pressure on the stainless steel throttle rod.

But this method proved satisfactory. A piece of timber between the carb body and the metal thottle plate, which is notched into the throttle rod, gave all the support needed without pressuring any component unduly.
Take the nut off and the retaining disk.

Then remove the aluminum washer

and the bracket.

There should be a seal under there but there wasn't in mine!

And finally for carb no. 2 you will need to punch out the pin that holds the part onto the end of the throttle rod. Getting the right sized punch is the trick here.